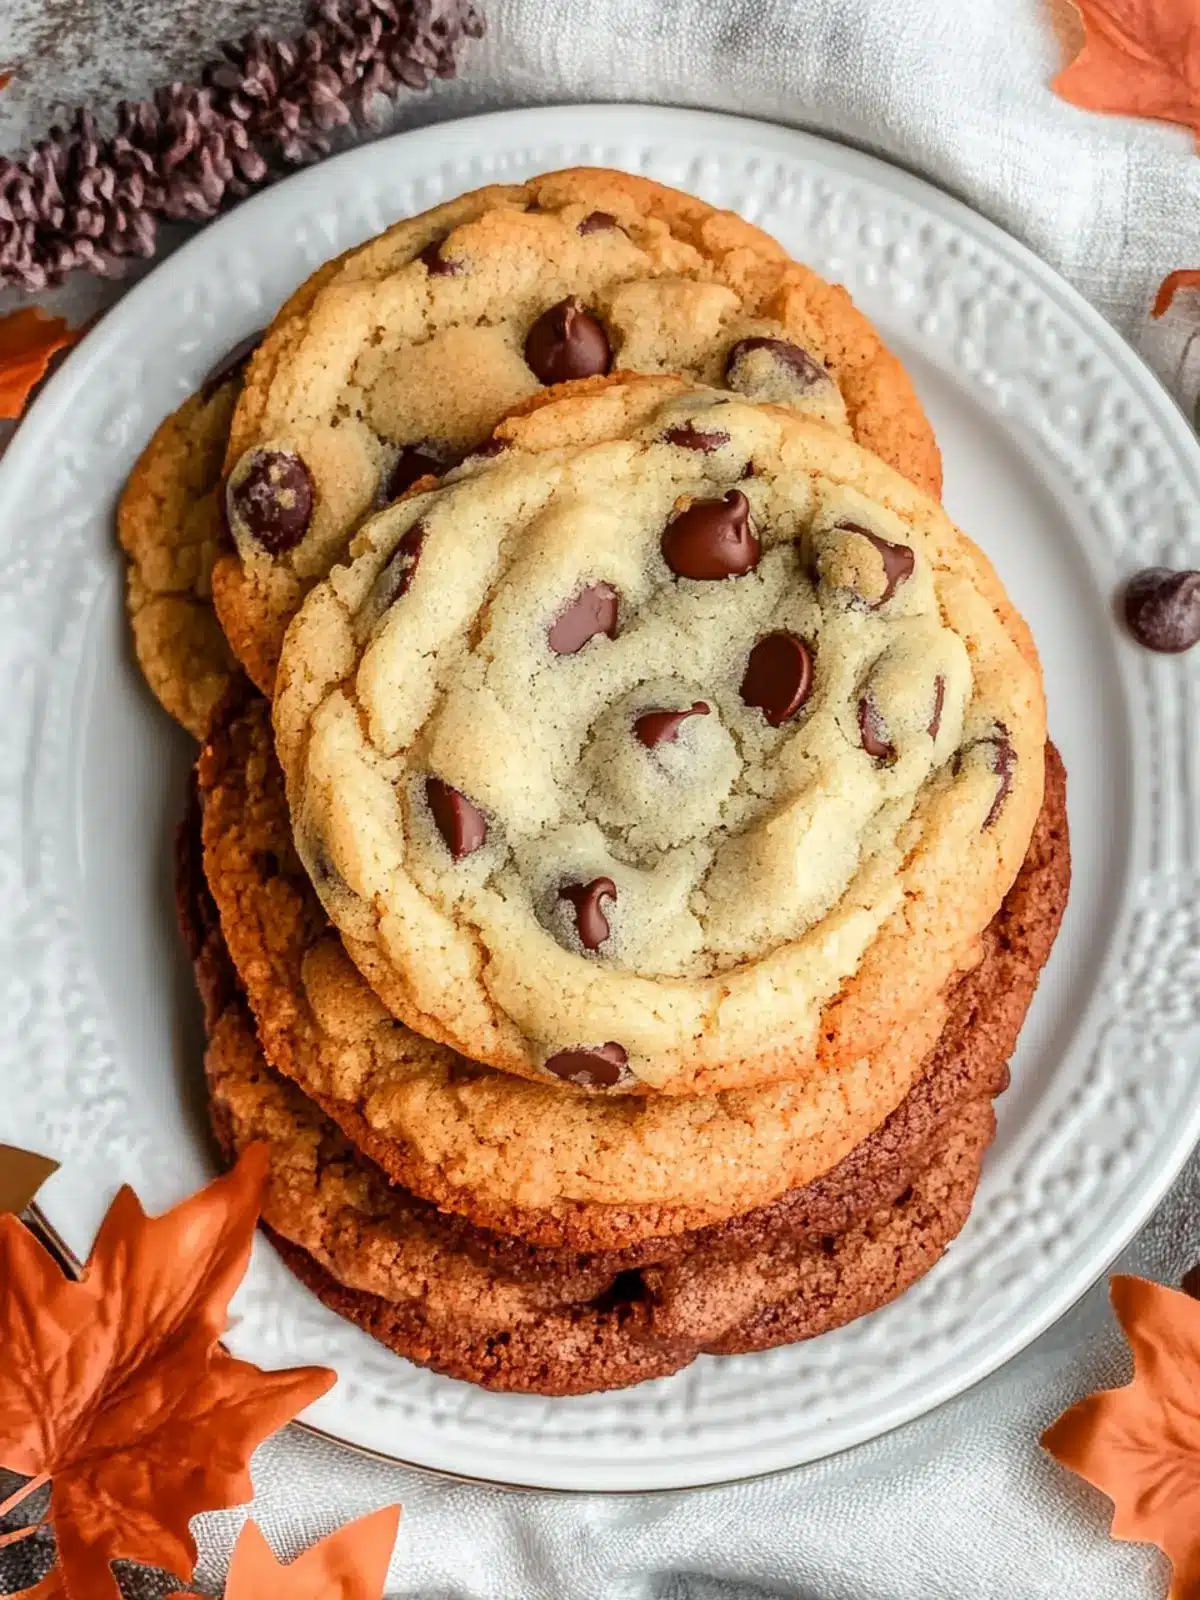
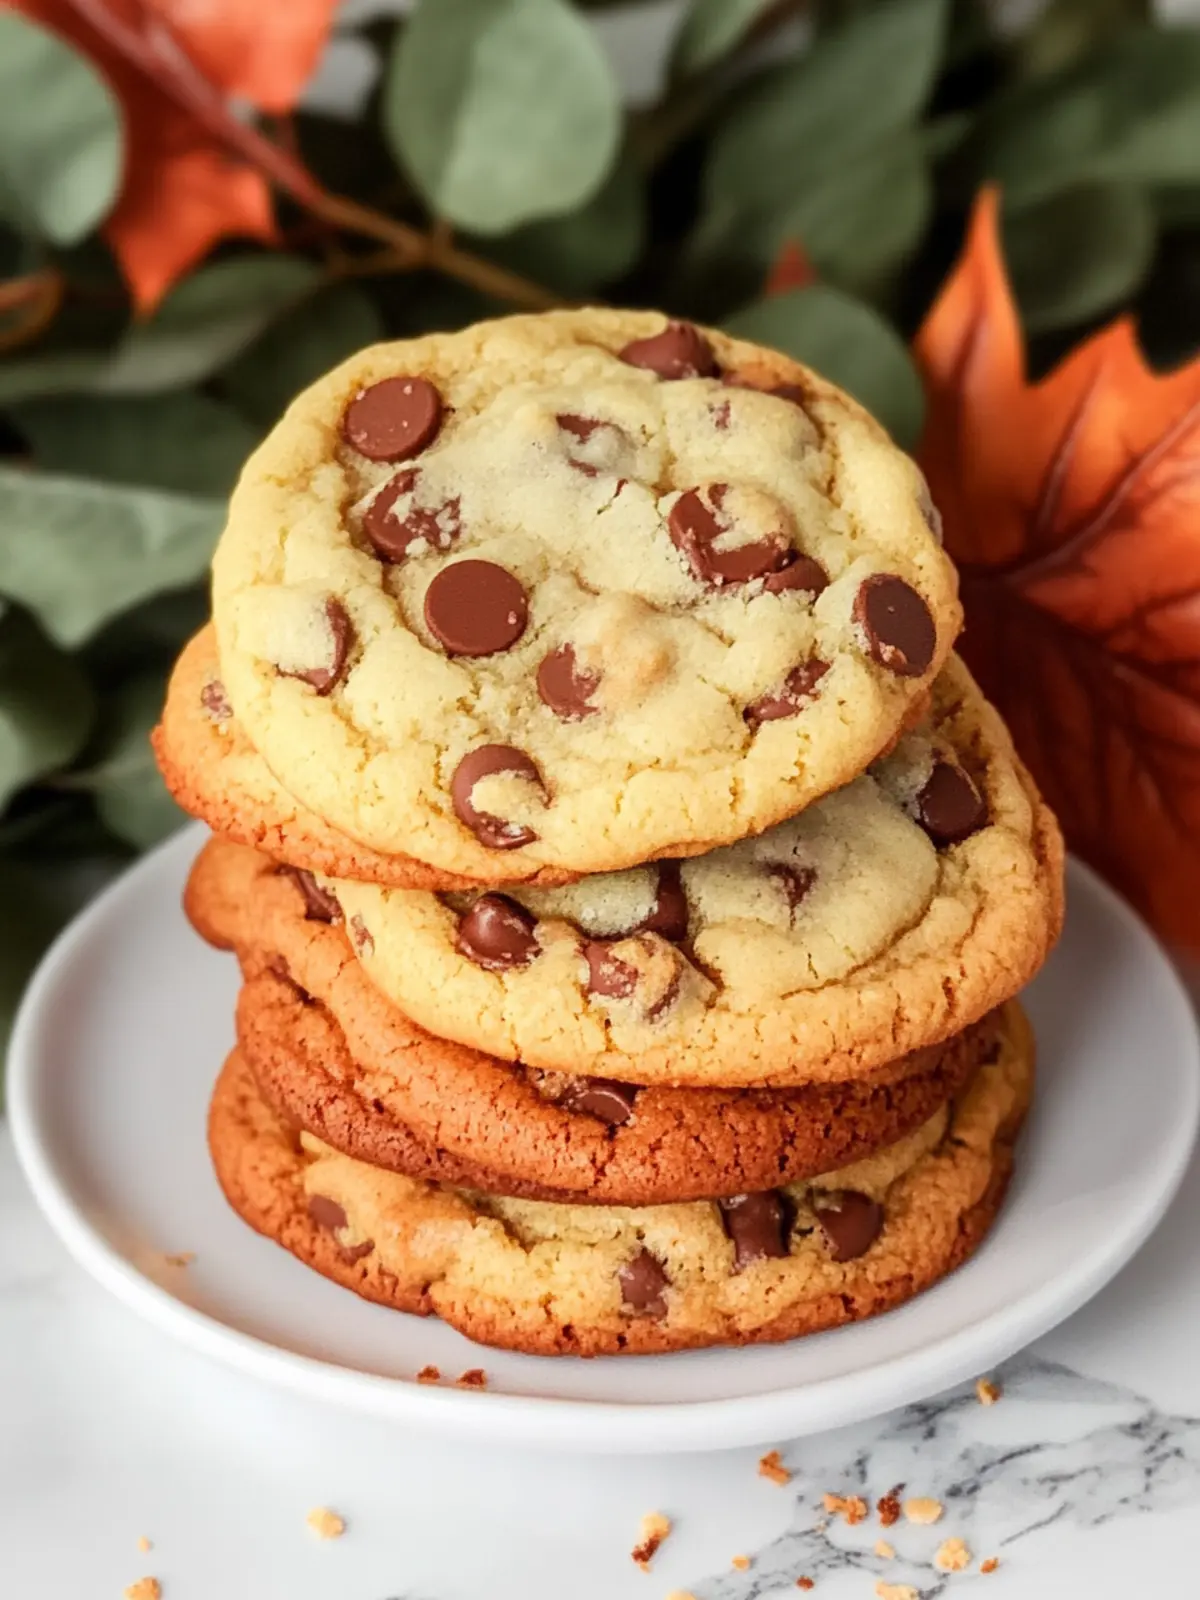
The scent of freshly baked cookies can transform an ordinary afternoon into a delightful experience, don’t you think? One bite of these Harvest Marble Chocolate Chip Cookies, with their vibrant swirls of color and rich, gooey chocolate, and you’ll feel as if autumn has come to visit. I’m often on the lookout for recipes that not only satisfy my sweet tooth but also bring a touch of whimsy to the table. This particular cookie creation does just that, effortlessly marrying nostalgia with a seasonal twist.
With just a few ingredients and a quick process that will have you in and out of the kitchen in under 30 minutes, these cookies are perfect for cozy gatherings or a simple family treat. So, whether you’re trying to impress at a potluck or simply craving a homemade snack, let’s dive into this delightful recipe that will make you forget all about bland fast food!
Why love Harvest Marble Chocolate Chip Cookies?
Irresistible Flavor: These cookies boast a delightful combination of buttery sweetness and rich chocolate, creating a treat you won’t soon forget.
Creative Fun: The vibrant colors make baking fun for all ages; involve your little ones or whip them up for festive celebrations.
Quick & Easy: With a total time of just 22 minutes, you can enjoy these delicious bites without a lengthy commitment.
Crowd-Pleaser: Perfect for gatherings, these cookies will impress your guests and become a new favorite.
Versatile Treat: Enjoy them as is or add your personal touch with nuts or other mix-ins; the possibilities are endless!
Get ready to be the star of any occasion with this crowd-pleasing recipe!
Harvest Marble Chocolate Chip Cookie Ingredients
Get ready to gather the essentials for these delightful cookies that will awaken your kitchen with warmth and sweetness!
For the Cookie Dough
• 1 cup Butter – softened to room temperature for a smoother blend.
• 1 cup Granulated Sugar – adds that perfect sweetness and golden texture.
• 1/2 cup Brown Sugar – brings a rich, caramel flavor to the mix.
• 2 Large Eggs – binds the ingredients together for that perfect chewy bite.
• 2 teaspoons Vanilla Extract – enhances the cookie’s aroma and taste.
• 1 teaspoon Baking Soda – helps the cookies rise beautifully.
• 1/2 teaspoon Salt – balances the sweetness and elevates the flavor profile.
• 2 3/4 cups All-Purpose Flour – forms the base of your cookie masterpiece.
For the Chocolate Surprise
• 1 Bag Nestle Toll House Chocolate Chips – rich, melty treasures that bring joy in every bite!
Get ready to indulge in the deliciousness of these Harvest Marble Chocolate Chip Cookies, perfect for any gathering or simply a cozy night at home!
How to Make Harvest Marble Chocolate Chip Cookies
-
Cream Together: Begin by creaming the softened butter, granulated sugar, and brown sugar in a large mixer bowl. Mix until the mixture is light and fluffy—this usually takes about 2-3 minutes.
-
Incorporate Eggs: Add the large eggs and vanilla extract to the creamy mixture. Beat until everything is well combined and airy, making the batter look golden and smooth.
-
Mix in Dry Ingredients: Sprinkle in the baking soda and salt, and mix well to ensure it’s evenly distributed. These ingredients help your cookies rise perfectly!
-
Add Flour Gradually: Slowly add the all-purpose flour, mixing little by little until it’s completely incorporated and your dough is smooth and pliable.
-
Divide the Dough: Gently separate the cookie dough into three equal portions using your hands or a spatula. This is where the fun begins!
-
Color Your Portions: In a separate bowl, color one portion orange and another brown with your food coloring. Leave the third portion as is to create a beautiful marble effect.
-
Chocolate Chip Addition: Fold in the chocolate chips into each colored dough portion, ensuring they are evenly distributed for that yummy chocolate surprise in every cookie!
-
Shape the Cookies: Take about 2 oz. of dough from each color and roll them together to form a cookie ball. This will create the lovely marble effect when baked!
-
Prepare for Baking: Lightly press each cookie ball down onto a parchment-lined cookie sheet, ensuring they are spaced well apart for even baking.
-
Bake to Perfection: Place the cookie sheet in a preheated oven at 375°F for 8-10 minutes. Watch for edges that turn golden brown—you’ll know they’re ready to come out!
Optional: Sprinkle sea salt on top of warm cookies for an extra flavor boost!
Exact quantities are listed in the recipe card below.

Harvest Marble Chocolate Chip Cookies Variations
Embrace your creativity and make these cookies uniquely yours with a few delightful twists!
-
Gluten-Free: Substitute all-purpose flour with a gluten-free blend to enjoy these cookies without gluten. Just ensure your baking soda is also gluten-free!
-
Nutty Addition: Fold in 1 cup of your favorite nuts, like walnuts or pecans, for an added crunch that complements the chocolate beautifully. The combination of textures will make every bite a delight!
-
Pumpkin Spice: Add 1 teaspoon of pumpkin spice to the dough for a cozy autumn flavor that enhances the seasonal spirit of these cookies. Just imagine the warm aromas filling your kitchen!
-
Dairy-Free: Swap the butter with coconut oil and use dairy-free chocolate chips for a delightful treat that everyone can enjoy. The coconut oil adds a subtle sweetness that pairs well with the chocolate.
-
Mint Chocolate Twist: Incorporate 1 teaspoon of peppermint extract into your dough for a refreshing minty flavor that elevates your cookies to holiday status. Think of the joy this will bring to your festive gatherings!
-
Cinnamon Sugar Topping: Mix 1 tablespoon of sugar with 1 teaspoon of cinnamon and sprinkle this on top of your cookie dough balls before baking. This simple addition transforms the cookie’s outer layer into a delightful sweet crust.
-
Spicy Kick: Add a pinch of cayenne pepper or 1/2 teaspoon of chili powder to the dough for a surprising and exciting heat that contrasts with the sweet chocolate. This unique flavor combination is sure to impress adventurous eaters!
Let your imagination run wild and create your dream version of these Harvest Marble Chocolate Chip Cookies!
How to Store and Freeze Harvest Marble Chocolate Chip Cookies
Room Temperature: Store the cookies in an airtight container at room temperature for up to 3 days to maintain their freshness and chewy texture.
Fridge: If you prefer, you can refrigerate the cookies for up to a week, just be sure to place them in an airtight container to prevent them from drying out.
Freezer: For longer storage, freeze the cookies in a single layer on a baking sheet, then transfer them to a freezer-safe bag or container. They can last up to 3 months.
Reheating: When ready to enjoy your frozen cookies, simply reheat in a 350°F oven for about 5 minutes, allowing the chocolate to melt and return to that fresh-baked goodness!
Tips for the Best Harvest Marble Chocolate Chip Cookies
Use Room Temperature Butter: Ensure your butter is softened to room temperature for smooth creaming, which leads to light and fluffy cookies.
Don’t Overmix: Mix just until ingredients are combined. Overmixing can lead to tough cookies instead of tender delights.
Divide Evenly: When separating the dough, make sure portions are equal to ensure uniform baking and perfect marbling in each cookie.
Watch the Oven: Keep an eye on your cookies while baking; overcooking can result in a dry texture. Look for the golden brown edges!
Cool Before Storing: Let the cookies cool completely on a wire rack before storing. This prevents them from becoming soggy and maintains their delightful crunch.
With these tips, your Harvest Marble Chocolate Chip Cookies will be a guaranteed hit!
Make Ahead Options
These Harvest Marble Chocolate Chip Cookies are perfect for busy home cooks looking to save time during hectic weeks! You can prepare the cookie dough up to 48 hours in advance by mixing all the ingredients and storing it in an airtight container in the refrigerator. To maintain that fresh-baked quality, remember to wrap the dough tightly to prevent drying out. Alternatively, you can shape the cookie balls ahead of time and freeze them for up to 3 months. When you’re ready to bake, simply place them directly on the baking sheet (no need to defrost!) and bake as instructed for delicious treats that taste just as good as if you made them fresh that day!
What to Serve with Harvest Marble Chocolate Chip Cookies?
The perfect cookies deserve a little something extra to create a memorable moment!
- Cool Milk: A classic pairing, cold milk enhances the cookies’ sweetness and balances the rich chocolate.
- Vanilla Ice Cream: The creamy texture and subtle vanilla flavor meld beautifully with the warm cookies, creating a delightful contrast.
- Hot Coffee: A warm cup of coffee amplifies the cozy aroma of the cookies, making for a perfect afternoon treat.
- Choco-Hazelnut Spread: Spread a layer on these cookies to add an extra dimension of chocolate and nuttiness; pure bliss in one bite!
- Spiced Apple Cider: The fragrant notes of cinnamon and apples perfectly complement the cookies’ sweetness, ideal for autumn gatherings.
- Fresh Fruit Platter: Bright, juicy fruits refresh the palate and provide a contrasting texture to the cookies; consider berries, apples, or pears.
Round out your baking adventure with these delightful pairings that will elevate your Harvest Marble Chocolate Chip Cookies to new heights!
Harvest Marble Chocolate Chip Cookies Recipe FAQs
What kind of butter should I use for the cookies?
Absolutely! It’s best to use unsalted butter that’s been softened to room temperature. This allows for a smooth creaming process, which is essential for light and fluffy cookies. Room temperature butter blends better with sugars, giving the perfect base for your dough.
How should I store leftover cookies?
For the best flavor and texture, store your Harvest Marble Chocolate Chip Cookies in an airtight container at room temperature for up to 3 days. If they start to get a little stale, you can revive them by warming them in the oven for a minute or two.
Can I freeze the cookie dough?
Yes, you can freeze the cookie dough for later enjoyment! Shape the dough into individual cookie balls, place them on a baking sheet, and freeze until firm. Then, transfer the frozen dough balls to a freezer-safe bag, where they can last up to 3 months. When you want to bake them, no need to thaw—just bake directly from the freezer, adding an extra minute or two to your baking time.
How do I know when the cookies are done baking?
Watch for the edges to turn a golden brown; that’s your cue they’re ready! The centers may still look a little soft—this is normal, as they’ll continue to cook slightly after being pulled from the oven. Let them cool on the cookie sheet for a few minutes before transferring to a wire rack.
Are these cookies safe for my pets?
While the ingredients in Harvest Marble Chocolate Chip Cookies may be delicious to us, please remember that chocolate is toxic to dogs and some other pets. Always keep baked goods containing chocolate out of reach to ensure your furry friends stay safe.
What if my cookies turn out flat?
If your cookies spread too much, it might be due to using melted butter instead of softened butter, or not enough flour was added. Make sure your measuring cups are leveled off, and if necessary, chill your cookie dough for about 30 minutes in the fridge before baking to help them hold their shape.

Delicious Harvest Marble Chocolate Chip Cookies Made Easy
Ingredients
Equipment
Method
- Begin by creaming the softened butter, granulated sugar, and brown sugar in a large mixer bowl.
- Add the large eggs and vanilla extract to the creamy mixture. Beat until well combined.
- Sprinkle in the baking soda and salt, and mix well to ensure it's evenly distributed.
- Slowly add the all-purpose flour, mixing little by little until the dough is smooth.
- Gently separate the cookie dough into three equal portions.
- In a separate bowl, color one portion orange and another brown with your food coloring.
- Fold in the chocolate chips into each colored dough portion.
- Take about 2 oz. of dough from each color and roll them together to form a cookie ball.
- Lightly press each cookie ball down onto a parchment-lined cookie sheet.
- Place the cookie sheet in a preheated oven at 375°F for 8-10 minutes.